How To Integrate Facebook With WordPress

Email Newsletter
Weekly tips on front-end & UX.
Trusted by 200,000+ folks.

 Flexible CMS. Headless & API 1st


We did some research to find out how the integration of Facebook with WordPress and vice versa works, or — in other words — how you can present your WordPress blog on Facebook or use the functionality of Facebook on your WordPress-powered blog. Both of these can be achieved with a set of WordPress plug-ins, a couple of which we’ll present here in detail.
1. Integrating A WordPress Blog Into Facebook
Integrating a WordPress blog into Facebook is actually quite simply achieved via the Facebook API. The Facebook API makes programming applications that can be spread via Facebook almost a piece of cake. A lot of interactive browser games are on Facebook, such as the currently popular “Mafia Wars.” This game allows users to start a mafia family with their friends, with the goal of becoming an important figure in the virtual underground crime scene. To start a clan, you invite other friends on the network to join. This is the growth strategy of any application on Facebook: the simple snowball effect.
The applications sustain themselves through earnings generated by displaying advertisements, which also makes Facebook an even more attractive platform to develop on. This symbiosis generates growth for both Facebook and its applications.
Plug-In Installation and Configuration
John Eckman developed the WordPress plug-in Wordbook in early 2009. This plug-in allows WordPress blog owners to integrate their blog in Facebook. This gives a blog two lives: one as an application on Facebook (such as, for example, my private FreigeistBlog) and one at the original URL (https://freigeist.devmag.net).
To access a blog via Facebook, you need to first grant access to the application. To do this, go to the so-called “canvas” page, which is where the Facebook twin of the blog lives (my example). However, granting access to the blog’s application means that the administrator of the blog also has access to information about you as a user (this is what most applications aim for: information such as date of birth, gender and educational status allows them to display quite targeted ads).
The application we’re dealing with is a simple blog and, in this sense, quite innocent, but we should state outright that the Facebook API as it is now treats blogs and websites as applications, which may not be appropriate, given the issue mentioned above. Facebook users who authorize the blog application can now easly send comments and share posts from within Facebook. The data, however, is still stored in the original database on the server where the blog is installed.
This makes it look as though Facebook serves merely as a simple feed reader. Yet, we get some other benefits. The blog on Facebook can be used to create a community around it by taking advantage of Facebook’s snowball effect, because friends of the blog’s users will see in their activity stream that they have been participating on the blog. Furthermore, it means that Facebook users will see new posts from your blog whenever they sign in to Facebook and can easily follow comments, making your blog more accessible.
To create a Facebook twin of your blog, first you have to set up a new application. To do this, you need a Facebook account and have to register as a developer using the preceding link. All of this can be done in a few minutes.
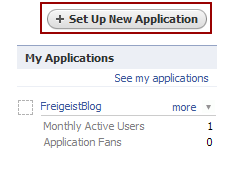
Create a new Facebook application
Once you have agreed to the terms of use, give your application a name. Then you will receive your API key and a secret, which you will need later.
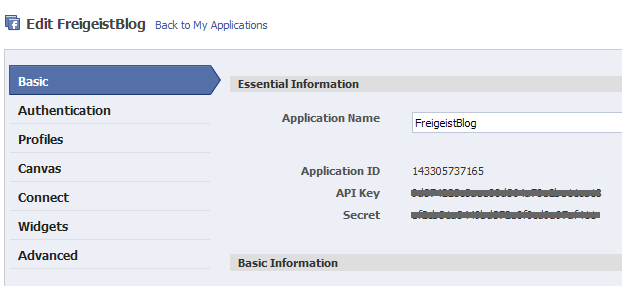
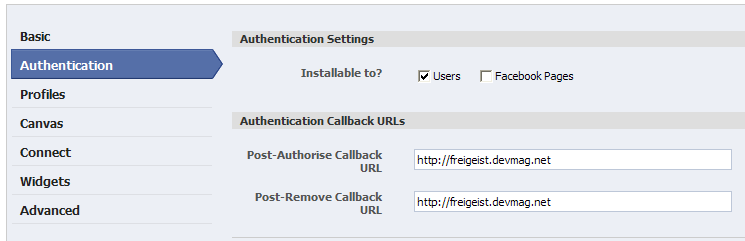
Settings for the Facebook application. Large view.
Then, you have to submit a so-called “post-authorize callback URL.” This is the address on your server to which Facebook will send a notice whenever a user authorizes access to the application. By the same logic, there is also the “post-remove callback URL,” which receives a notice when a user removes the application. Both of these events are handled by the Wordbook plug-in. You merely need to write the address of the blog’s root directory with a trailing slash.
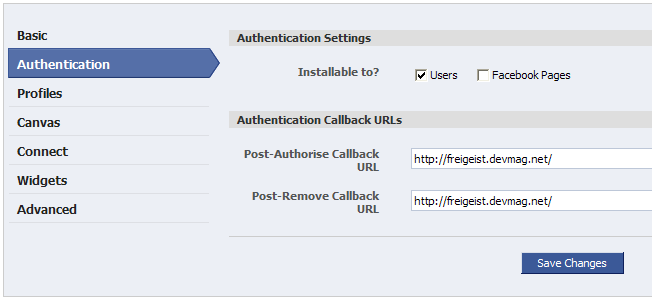
Facebook application settings: Define callback URLs. Large view.
The third step is to claim your canvas page, which is the page through which a Facebook user accesses your blog, and a canvas callback URL, which is the page from which content is retrieved. Again, include a trailing slash, or else internal links on your blog won’t work with their Facebook twin.
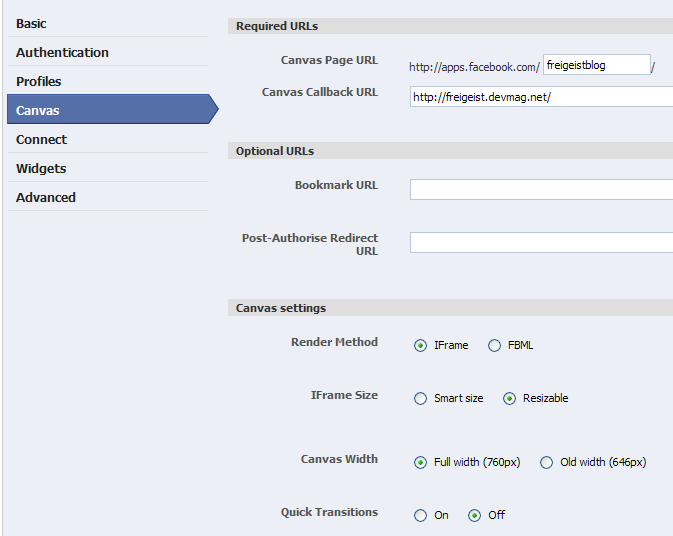
Facebook application settings: Define canvas page. Large view.
Now you have some choices to make, namely, how to set up your canvas page. You have a choice between iFrame and FBML. FBML is a Facebook XML scheme with which you can use specific Facebook tags (such as tags to display user profiles). You can also use it to access certain Facebook procedures. However, the Wordbook plug-in works with iFrames, which allow Javascript and other tags, and which FBML does not support.
To distinguish between them rather crudely, you can say that iFrames give the developer more flexibility but, unlike FBML, restrict access to Facebook procedures. Another advantage of iFrames is that code that Facebook retrieves from the canvas callback URL need not be parsed by the FBML parser, which could yield a performance gain. With iFrames, only internal links on the blog need to be adjusted. And the “resizeable” option allows Facebook’s JavaScript code to adjust the size of the iFrame to Facebook’s layout.
Now the hard work is done. All that’s left is to install the Wordbook plug-in using the standard WordPress method: install and activate. Then you can change the plug-in’s settings on the settings panel, and here you will need your application ID and the secret. You also have to tell the plug-in where the canvas page is located, so that internal links can be adjusted.
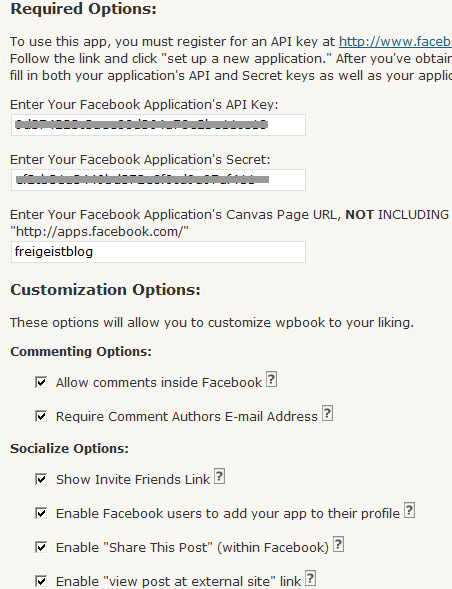
Adjusting the settings of the Wordbook plug-in
And that’s it! If you want, you could activate or deactivate some other options, such as the commenting function and whether users can add your application to their profile by displaying the latest posts from your blog in their profile.
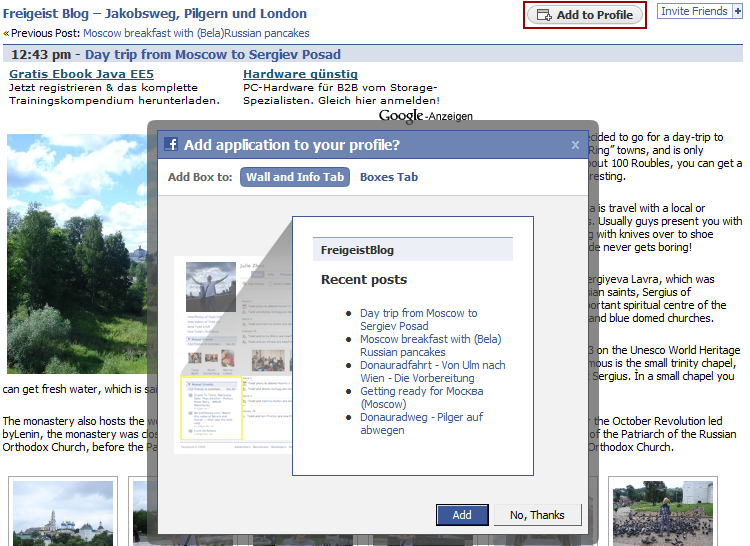
Browsing through the blog via Facebook. Large view.
The plug-in allows you to play around a little bit. But as we said, you are somewhat limited in how fully you can integrate your blog into the Facebook canvas. But the next plug-in we’ll look at integrates a bit of Facebook into your blog.
2. Integrating Facebook In A WordPress Blog
To begin, a little history lesson is needed. Many users do not like having to register for each blog where they would like to post comments, especially if they already have accounts on so many other social networks, such as Facebook and MySpace. So a single online ID for several purposes would be ideal, wouldn’t it? That’s the idea behind the OpenID protocol, which started in 2005. It decentralizes the identification of users for various providers and services. In essence, you can create an account on Facebook and connect it to services such as MySpace or even a personal blog. If you want to change your profile for all of these services, that too is decentralized: you simply change the settings on your Facebook account. OpenID is a chance to make the Web and its services more easily accessible. There are reasonable risks and concerns involved, but also many opportunities.
Facebook announced in 2007 that it would implement OpenID, and others followed, which explains why we now find more and more buttons that say “Connect with Facebook” or “Google Friend Connect.” This leads us to our second plug-in, Facebook Connect WordPress plug-in, which almost seamlessly integrates Facebook into your blog.
The plug-in allows users to comment on a blog using their Facebook account; and if they are already signed in or on Facebook, they need not sign in again. Users do not have to register for a unique account on the blog because the plug-in retrieves the user’s information directly from the Facebook API. With access to the user profiles on Facebook, you can display your users’ profile pictures, which adds a personal touch to your blog.
The plug-in integrates a lot of Facebook functions: for example, users can send invitations and share stories and comments on Facebook, which gives your blog the benefit of word-of-mouth marketing. To do this, you need to activate the plug-in option that publishes a user’s activity in their respective activity feed. Last but not least, you can enable a gadget that displays the profile pictures of your blog’s most recent visitors, similar to “Google Friend Connect.”
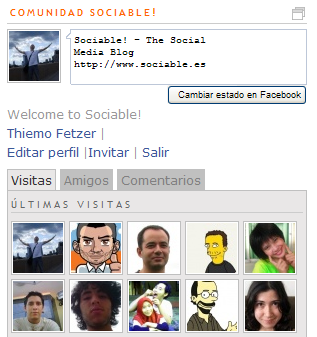
Facebook Connect implemented on sociable.es (in Spanish)
This plug-in essentially does the opposite of Wordbook (which integrates Facebook functionality into your blog).
Plug-In Installation and Configuration
Again, as in the previous section, you will need to create a new Facebook application.
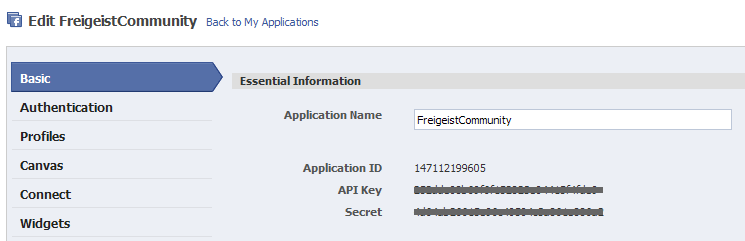
Creating a new Facebook application. Large view.
You will also have to define the callback URLs, which point to the root of your blog.
Defining callback URLs for the new application. Large view.
Again, most of the work is now done, and you can soon start having fun and being creative. Just a few steps remain. First, download the plug-in from the website (see link above) and upload and enable it. A big part of the plug-in consists of the “Facebook Connect” library, which is provided by Facebook. You might stumble over the two xd_reciever files, one in HTML and one in PHP. They play a key role: enabling the so-called cross-domain communication (hence, the xd) between your blog and Facebook.
So why are these needed? Typically, HTTP requests are sent with the XMLHttpRequest object. However, the typical security settings on browsers allow XMLHttpRequest to send requests only to the domain where the original request was sent to. In our case, requests are send to and from Facebook. This cross-domain communication is achieved with iFrame cross-domain communication. With this, the application opens an iFrame on facebook.com with the relevant requests; for example, to retrieve information on whether a user is logged into Facebook.
These requests are sent to Facebook through the iFrame via the URL, with which the iFrame is opened. The request is checked, and now the Facebook script that was called via the iFrame opens an iFrame on the application page, where the outcome of the request is sent to, again with the query string of the URL. The result of any requests lands in the query string of the xd_receiver.htm file on your own server. This circumvents the problem of being unable to use XMLHttpRequest.
Now back to the plug-in. Once you have installed and activated the plug-in, you can add the plug-in as a widget to your blog’s sidebar. However, you first need to enter your API key and secret.
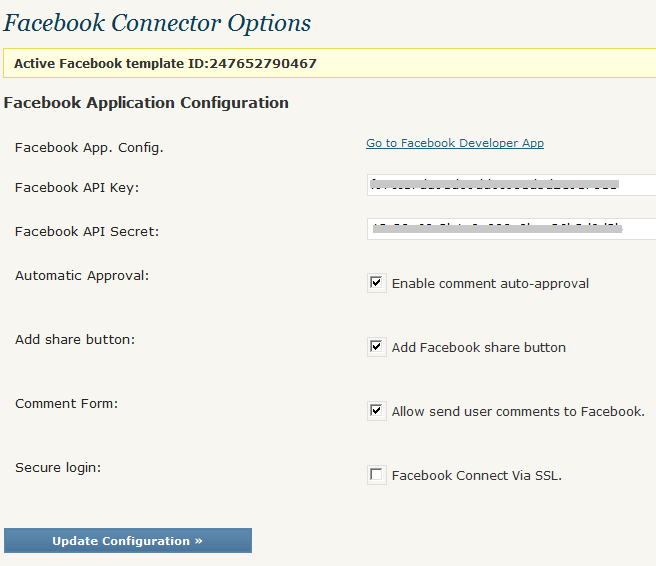
Settings for Facebook Connect WordPress plug-in. Large view.
As you will see, a whole lot of options are enabled by default, such as automatically publishing comments if they are posted through a Facebook account (the rationale being that you don’t have to moderate them because they come from actual people using Facebook and not spambots).
If you activate the sharing function, the plug-in adds a “Share” button automatically below each post. You can also activate the option that publishes a user’s comments in their activity feed on Facebook, thus making their activity on your blog visible to their friends.
After you have adjusted the settings, you will be notified that you need to define templates for the presentation. These need to be “synchronized” with Facebook. Scroll down a bit to generate and activate these templates. You can change the language manually here as well.
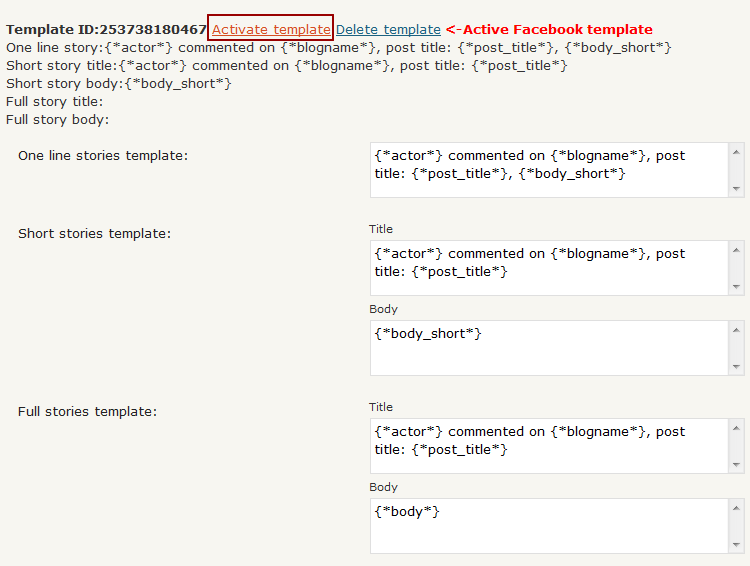
Adjust Facebook Connect’s template settings. Large view.
The first template controls how a user’s activity is posted in their activity feed on Facebook. However, you can also include the activity feed of your users in your gadget, as done on sociable.es (see link above). The last step is to go to the widget set-up page and include the gadget as a widget in your sidebar.
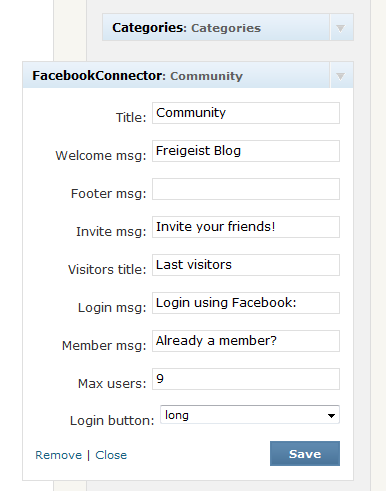
Including the Facebook Connect widget in the sidebar
Here again, you have some choice over the configuration, especially with regard to changing the language, showing a big or small “Connect to Facebook” button, etc. After installing the plug-in, you may want to see what else you can do with it. The implementation on sociable.es is quite a nice one.
Further Resources
These two plug-ins are quite specific in what they do. However, a wide variety of Facebook plug-ins are available for platforms other WordPress. Here is a list, certainly not comprehensive:
- Designing A Facebook Fan Page: Showcases, Tutorials, Resources
- How To Integrate Facebook, Twitter And Google+ In WordPress
- Bringing Angry Birds To Facebook


