How To Develop WordPress Locally With MAMP

Email Newsletter
Weekly tips on front-end & UX.
Trusted by 200,000+ folks.
 Flexible CMS. Headless & API 1st


Local development refers to the process of building a website or Web application from the comfort of a virtual server, and not needing to be connected to the Internet in order to run PHP and MySQL or even to test a contact form. One of the most annoying parts of development, at least for me, is the constant cycle of edit, save, upload and refresh, which, depending on bandwidth and traffic, can turn a menial task into a nightmare.
With application platforms such as WordPress, which require a server back end to work, you would normally be constrained to develop on a live server, with the headaches that go along with that. MAMP and its Windows counterpart, WAMP, are tools that allow you to locally develop applications that require a server on the back end.
The Local Server
MAMP, which stands for Macintosh, Apache, MySQL and PHP, is an application that allows you to install a local server-type environment in order to construct websites that would normally require you be on a live server somewhere. Ever opened a contact form in a browser from your desktop and wondered why it doesn’t work? The server-side components cannot operate without (in this case) the PHP back end, and this is where MAMP comes in. By installing this application, we can have a virtual server locally as our development sandbox. It is worth noting, from a portability standpoint, that this component can be run only from your desktop environment and cannot be installed on a USB drive. With that all settled, let’s get to it.
In order to be able to work with MAMP, we must first obtain it. So, head over to the project page and download the disc image. Double-click to begin the installation, and you will be presented with a choice:
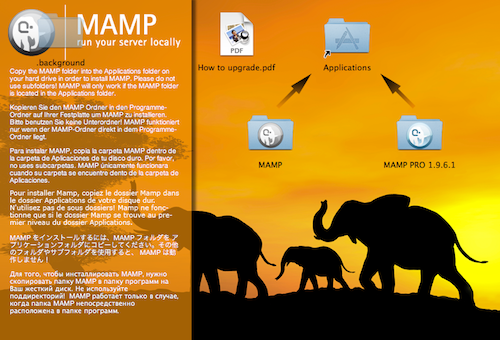
Both MAMP and MAMP Pro come in the same download. You need to install only one, and for most scenarios, MAMP is more than adequate. The pro version costs $59.00 USD and offers more options, and you can compare the two versions for yourself.
Drag the MAMP folder onto the “Application” shortcut, and the installation will be underway. Once it’s completed, feel free to eject the disc image. Open up your “Applications” folder, and locate the new MAMP directory. Inside you’ll find MAMP.app, so — you guessed it — open it up. The program should start right away and open up your default browser, pointing to the start page. Congratulations, you now have a local server!
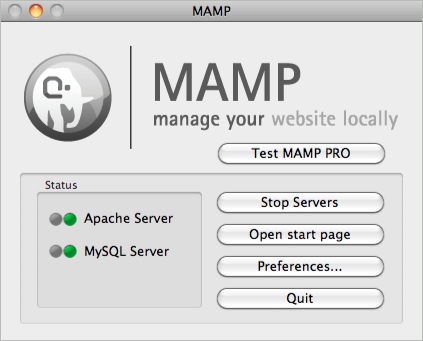
Preferences
From the main MAMP app screen, you will notice a “Preferences” button. Feel free to click on it to view the few options available.
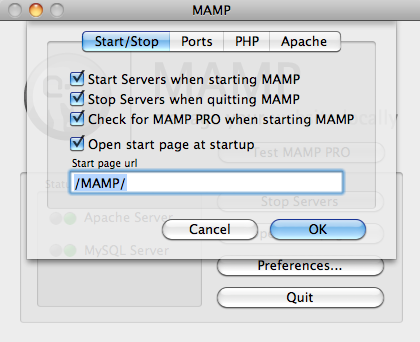
1. Start/Stop
From here, you have the option to tell MAMP when to start and stop the servers. If you choose to not start the servers automatically, then you will need to explicitly tell them to run each time you open the app. You may also set your home page, which defaults to the MAMP start screen, giving you quick access to phpMyAdmin; but you may set it to something like a WordPress directory.
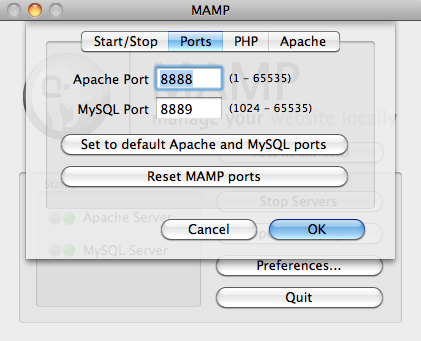
2. Ports
In the “Ports” tab, the default Apache port will usually be 8888, and the default MySQL port will be 8889. I, for one, do not change these because they do not interfere with any of my other settings and do not require me to enter my password every time I start and stop the servers. You must include the port number in your URL this way; so, it would be localhost:8888/. To avoid this, you could change the ports to what general Web servers operate on: ports 80 and 3306. This will allow your URL to simply be localhost/; but you will most likely need to enter your password when switching the servers on and off. Another factor to consider is whether you are installing WordPress “multisite”; if you are, then you are required to set the ports to the default Apache and SQL ports of 80 and 3306, respectively.
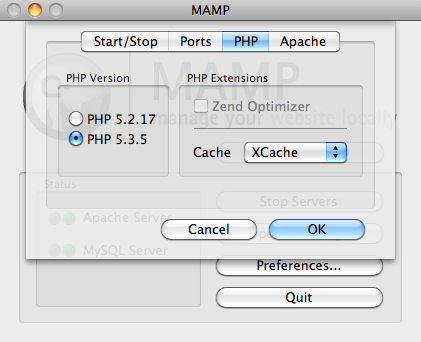
3. PHP
The “PHP” tab allows you to choose which version of PHP to run in the set-up. It will default to 5.3, and I do not change this because most applications I run either require PHP 5.3 or do not care. Just know that this option is available if you need it to run something such as legacy software.
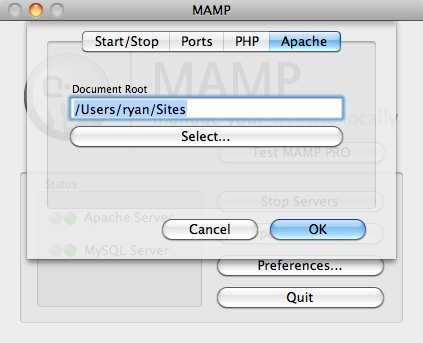
4. Apache
The “Apache” tab is one that I like to mess with, to change the document root directory. The root is where all of your websites and directories will be stored and accessed by MAMP, and it defaults to /Applications/MAMP/htdocs, which I find annoying to get to. So, I change mine to my sites folder. From the MAMP app window, click on “Preferences,” then on “Apache.” You can click “Select” and then set the installation to use the location of your choice for your websites. Again, I set mine to the sites folder for easier access.
Installing WordPress
Now it is time to install WordPress. Head to the WordPress website and download the latest version, 3.2 as of this writing. Unzip the folder, and then simply drag it to your sites folder, (or wherever you chose to set the document root for MAMP). WordPress requires PHP and MySQL to operate, which is why we needed MAMP to develop locally; so, we now need need to make a database. Fear not: it is simple!
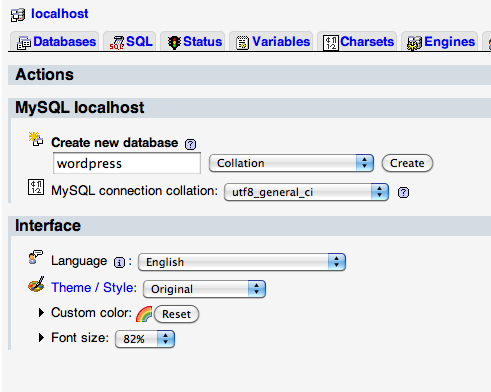
Open the MAMP start page — you can access it via the button in the main app — and click on “phpMyAdmin” in the top menu. Creating a new database is as simple as typing a name in the field and hitting the “Create” button. You can see below that I am creating a new database aptly named “wordpress.” Once that’s done, feel free to close phpMyAdmin, and navigate to the WordPress directory in your document root.
Basic Configuration
Find the file named wp-config-sample.php, and open it in your favorite text editor. We have to configure a few settings. The default values for MAMP installations make this really easy to fill out, so follow the table below to see what to type where:
| Variable | Value |
|---|---|
DB_NAME | wordpress |
DB_USER | root |
DB_PASSWORD | root |
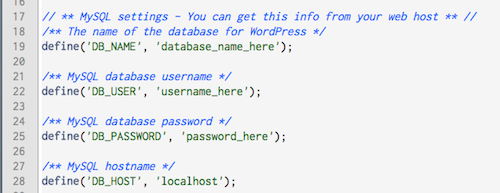
You should not need to alter anything else in this file, at least for now. You could add in the unique keys and salts, but I recommend doing that once you move the website into production.
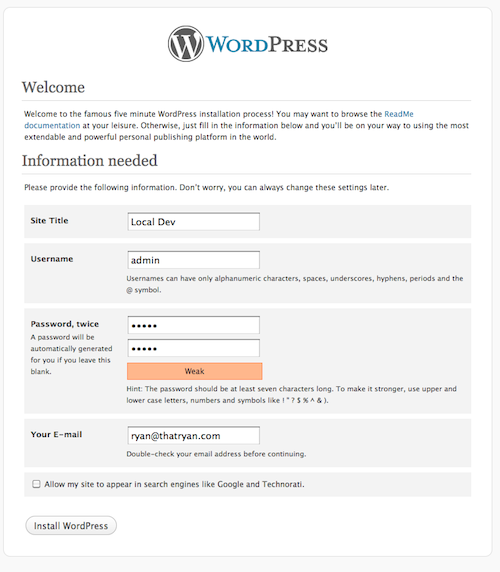
Save and close wp-config-sample.php. We’re nearly done. Rename this file to wp-config.php — removing the -sample — and we are ready to complete the installation. You should now be able to point your browser to https://localhost:8888/wordpress and see the WordPress installation screen. Enter in your basic data and install the app. You are now ready to log into the admin section and get going!
Permalinks
Always follow WordPress’ permalink structure. In order for you to get these “pretty URLs,” Apache will need mod_rewrite to update your .htaccess file, so let’s make sure that is set up.
The file we have to edit is httpd.conf, and you can find it in Applications → MAMP → conf → apache → /. Open this file, and search for a line like this:
LoadModule rewrite_module modules/mod_rewrite.soNote that a hash (#) may or may not be in front of it. The hash indicates a comment, and if you see it, you must remove it to allow the mod_rewrite module to load. If the line is not commented out, then congratulations: you are already done! Close the file, and permalinks should now work in your local installation.
The Final Countdown
By now, a local server set up with WordPress should be installed and running. The remaining steps are both short and crucial to sharing your creation with the Internet. All that remains is to transfer your local accomplishments to a global environment by moving both our WordPress files and our content. So, let’s finish this up!
Going Live
The time has finally arrived. So, how do you bring your WordPress creation to the live server? Well, we have two options.
Just Grab the Content
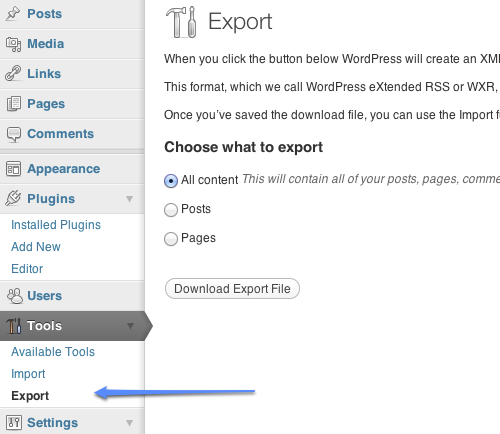
A sometimes simpler way, with only a few steps, is to just grab all of your content. This is easiest if WordPress is already installed and you just need to import your theme and content. To do this, head to the admin dashboard, to the “Tools” section in the sidebar. Click on “Export,” and choose “All content.” This will export a file that you can then import into your new installation.
You can now upload your WordPress theme files to the live location. Head to the “Tools” section of the dashboard again, and choose “Import.” Simply point to the file that you just exported, and bring in your content.
Bringing In Everything
I use this method if I have done everything locally from the ground up. I’ll upload my entire local WordPress directory (in this case, https://localhost:8888/wordpress) to the live server and then grab the database file and transfer that from local to live as well.
Because you could certainly build nearly the entire website in your development environment, bear in mind that WordPress uses absolute paths for URLs. So, every image and link will be prepended with https://localhost:8888/ (depending on your set-up). We need a way to alter this to fit the live website. We have a few options.
1. Export, Search and Replace
Using this method, we export our local database as a text file and run a “Find and replace” on the text to replace all occurrences of the localhost URL with the production URL.

Begin by opening phpMyAdmin and clicking on your WordPress database on the left. Click on the “Export” tab in the top menu, and be sure to choose “Select all” when choosing which tables to export. At the bottom, check the box to “Save as file,” and then hit “Go.” Open the resulting file in your favorite text editor, and simply run a “Find and replace” to replace all instances of https://localhost:8888/wordpress with https://www.YOUR_SITE_URL.com.
Save the edited file, and visit phpMyAdmin on your live server. Again, click on your WordPress database, and this time choose the “Import” option from the top menu, and browse for your newly edited file. Once it successfully imports, upload your WordPress directory to the live server. If WordPress is already installed, simply upload your theme, any plug-ins you have installed locally and the contents of your wp-content/uploads folder; or else, upload the entire local directory to your live website’s root. Once that’s uploaded, be sure you can log into wp-admin, and browse around to make sure everything made it in. Update your permalink’s structure to something friendlier, and you are off!
2. Using SQL Queries
A second way to alter URL paths is to first bring everything into the live server version, and then use a few SQL queries to find and replace the necessary strings. Open phpMyAdmin on your local server, and export the database, again making sure to select all tables and to save it as a file. Go to your live server, and import the .sql file that you just saved. In the top menu, click on the tab for “SQL,” whereupon you will see a text area. You will need to enter some query syntax; be sure to replace the URLs in these code fragments with the ones that pertain to your set-up — namely, the localhost’s path and the URL of your new live website.
Replacing WordPress’ base URL path:
UPDATE wp_options SET option_value = replace(option_value, 'https://localhost:8888/wordpress', 'https://www.YOUR_SITE_URL.com') WHERE option_name = 'home' OR option_name = 'siteurl';Update the GUID that controls WordPress’ translating paths and post locations:
UPDATE wp_posts SET guid = REPLACE (guid, 'https://localhost:8888/wordpress', 'https://www.YOUR_SITE_URL.com');Update the URL paths in the content:
UPDATE wp_posts SET post_content = REPLACE (post_content, 'https://localhost:8888/wordpress', 'https://www.YOUR_SITE_URL.com');Update the URLs in the meta data of posts, such as attachments:
UPDATE wp_postmeta SET meta_value = REPLACE (meta_value, 'https://localhost:8888/wordpress','https://www.YOUR_SITE_URL.com');Final Thoughts
We have managed to install MAMP to set up a local server sandbox to develop in, and we’ve configured and installed a WordPress platform to develop in, saving the need for purely online development tactics.
I hope this has given you some insight into setting up a local environment to work with WordPress. Keep in mind that this is just scratching the surface; WordPress is versatile. Now that we have this faster new way to develop, the next time we’ll get into some custom WordPress configurations.
Helpful Links
You may be interested in these related resources:
- “Spinning Up Multiple WordPress Sites Locally With DevKinsta”
A review on how to manage local WordPress sites with DevKinsta - “MAMP vs. MAMP Pro”
A chart comparing the two versions of MAMP - “Installing WordPress”
The walkthrough on how to install WordPress - “13 Useful WordPress SQL Queries You Wish You Knew Earlier”
A few SQL queries to aid with your WordPress development - “WordPress MultiSite with Subdomains on MAMP”
A 3-step tutorial on setting up subdomains with WordPress on MAMP - MAMP Documentation
Further Reading
- How To Become A Top WordPress Professional
- PHP: What You Need To Know To Play With The Web
- A Simple Workflow From Development To Deployment
- How To Improve Your WordPress Theme Development Process


