How To Create Tabs On WordPress Settings Pages

Email Newsletter
Weekly tips on front-end & UX.
Trusted by 200,000+ folks.
 Flexible CMS. Headless & API 1st


Overview
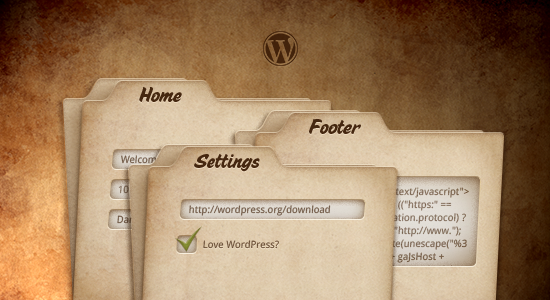
To get a quick grasp of the tabs we’ll be creating, go to Appearance/Themes in the WordPress admin area. You will find two tabs there: “Manage Themes” and “Install Themes.” When you click on one, the content changes and the tab’s title is highlighted.
The process is actually fairly simple: we set and send a tab variable when a tab is clicked. By querying this tab variable later, in $_GET[‘tab’], we will know which tab was selected so that we can highlight the corresponding title and display the corresponding tab.
In our approach, there are three times when we will need to know which tab the user is currently on:
- When we initially display the tabs and the form fields for the settings (in order to display the correct set of fields);
- When the user saves their settings (in order to save the correct fields);
- When redirecting the user after they have saved their settings (in order to redirect the user to the correct tab).
For the sake of brevity, we won’t explain all of the code, only the snippets that are relevant to this approach. You can, however, find all of the code in the accompanying theme.
Creating The Tabs
The first snippet we will inspect is the code that produces the tabs:
function ilc_admin_tabs( $current = 'homepage' ) {
    $tabs = array( 'homepage' => 'Home Settings', 'general' => 'General', 'footer' => 'Footer' );
    echo '<div id="icon-themes" class="icon32"><br></div>';
    echo '<h2 class="nav-tab-wrapper">';
    foreach( $tabs as $tab => $name ){
        $class = ( $tab == $current ) ? ' nav-tab-active' : ’;
        echo "<a class='nav-tab$class' href='?page=theme-settings&tab=$tab'>$name</a>";

    }
    echo '</h2>';
}
This function will be called later in the content for the settings page. We first define an array that contains all of our tabs. The first tab, which is displayed first by default, is homepage, where we can set up some option for the appearance of the home page. Then we have general, which could be a page containing options used throughout the website, and, finally, footer, to include a tracking code in the footer.

We then set up the URL links for each tab and output them. Notice that if the tab is open, an additional class, nav-tab-active, is added.
Displaying The Tabbed Content
The content for the settings page is displayed in the callback function for add_theme_page (which is an abstraction of add_submenu_page, with the parent slug set to themes.php), which in our theme will be named ilc_settings_page. This is where you will call the function that we just went over.
function ilc_settings_page() {
   global $pagenow;
   $settings = get_option( "ilc_theme_settings" );

//generic HTML and code goes here

if ( isset ( $_GET['tab'] ) ) ilc_admin_tabs($_GET['tab']); else ilc_admin_tabs('homepage');
If the tab is the default one, then $_GET[‘tab’] is not defined, in which case the current tab will be homepage and, thus, the highlighted one. Otherwise, the highlighted tab will be the one defined in $_GET[‘tab’].
Following the same function, we now need to display the right set of fields. Depending on the value of $tab, we would display the fields for the settings tab for the home page or for one of the other tabs:
<form method="post" action="<?php admin_url( 'themes.php?page=theme-settings' ); ?>">
<?php
wp_nonce_field( "ilc-settings-page" );

if ( $pagenow == 'themes.php' && $_GET['page'] == 'theme-settings' ){

   if ( isset ( $_GET['tab'] ) ) $tab = $_GET['tab'];
   else $tab = 'homepage';

   echo '<table class="form-table">';
   switch ( $tab ){
      case 'general' :
         ?>
         <tr>
            <th>Tags with CSS classes:</th>
            <td>
               <input id="ilc_tag_class" name="ilc_tag_class" type="checkbox" <?php if ( $settings["ilc_tag_class"] ) echo 'checked="checked"'; ?> value="true" />
               <label for="ilc_tag_class">Checking this will output each post tag with a specific CSS class based on its slug.</label>
            </td>
         </tr>
         <?php
      break;
      case 'footer' :
         ?>
         <tr>
            <th><label for="ilc_ga">Insert tracking code:</label></th>
            <td>
               Enter your Google Analytics tracking code:
               <textarea id="ilc_ga" name="ilc_ga" cols="60" rows="5"><?php echo esc_html( stripslashes( $settings["ilc_ga"] ) ); ?></textarea><br />

            </td>
         </tr>
         <?php
      break;
      case 'homepage' :
         ?>
         <tr>
            <th><label for="ilc_intro">Introduction</label></th>
            <td>
               Enter the introductory text for the home page:
               <textarea id="ilc_intro" name="ilc_intro" cols="60" rows="5" ><?php echo esc_html( stripslashes( $settings["ilc_intro"] ) ); ?></textarea>
            </td>
         </tr>
         <?php
      break;
   }
   echo '</table>';
}

?>
   <p class="submit" style="clear: both;">
      <input type="submit" name="Submit"  class="button-primary" value="Update Settings" />
      <input type="hidden" name="ilc-settings-submit" value="Y" />
   </p>
</form>
All of the settings will be stored in a single array in order to prevent several queries from being made.
Saving The Tabbed Fields
Now we need to know which slots of the array to save. Depending on the tab being displayed, certain options stored in the settings array will be displayed. If we just save all of the array slots, then we would overwrite some of the positions not shown in the current tab and thus not meant to be saved.
function ilc_save_theme_settings() {
   global $pagenow;
   $settings = get_option( "ilc_theme_settings" );

   if ( $pagenow == 'themes.php' && $_GET['page'] == 'theme-settings' ){
      if ( isset ( $_GET['tab'] ) )
           $tab = $_GET['tab'];
       else
           $tab = 'homepage';

       switch ( $tab ){
           case 'general' :
         $settings['ilc_tag_class'] = $_POST['ilc_tag_class'];
      break;
           case 'footer' :
         $settings['ilc_ga'] = $_POST['ilc_ga'];
      break;
      case 'homepage' :
         $settings['ilc_intro'] = $_POST['ilc_intro'];
      break;
       }
   }
   //code to filter html goes here
   $updated = update_option( "ilc_theme_settings", $settings );
}
We’ve used a switch conditional again to query the value of $tab and store the right values in the array. After that, we’ve updated the option in the WordPress database.
Redirecting The User To The Right Tab
Now that the contents are saved, we need WordPress to redirect the user back to the appropriate tab on the settings page.
function ilc_load_settings_page() {
  if ( $_POST["ilc-settings-submit"] == 'Y' ) {
   check_admin_referer( "ilc-settings-page" );
   ilc_save_theme_settings();

   $url_parameters = isset($_GET['tab'])? 'updated=true&tab='.$_GET['tab'] : 'updated=true';
   wp_redirect(admin_url('themes.php?page=theme-settings&'.$url_parameters));
   exit;
  }
}
Depending on whether the $_GET[‘tab’] variable is set, we use wp_redirect to send the user either to the default tab or to one of the other tabs.
Now our tabs are working, displaying the right set of fields, saving the right fields, and then redirecting the user to the correct tab.
Download The Theme
Almost any theme with a moderate number of options would benefit from tabs on the settings page. Just remember that this is one approach. Another approach would be to add several collapsable meta boxes, as seen on the page for writing posts, and to automatically collapse the boxes that are not frequently used. However, tabs enable you to better separate each set of options.
Finally, here is the theme, so that you can take a closer look:
The theme also implements the function whereby each tag is outputted with a unique CSS class, so you can check that out, too.
Further Reading
- The WordPress Theme Customizer
- Developing WordPress Locally With MAMP
- Checklist To Creating The Perfect WordPress Website


