Optimizing Next.js Applications With Nx

Email Newsletter
Weekly tips on front-end & UX.
Trusted by 200,000+ folks.
 Flexible CMS. Headless & API 1st


In this article, we will go through how to optimize and build a high-performance Next.js application using Nx and its rich features. We will go through how to set up an Nx server, how to add a plugin to an existing server, and the concept of a monorepo with a practical visualization.
If you’re a developer looking to optimize applications and create reuseable components across applications effectively, this article will show you how to quickly scale your applications, and how to work with Nx. To follow along, you will need basic knowledge of the Next.js framework and TypeScript.
What Is Nx?
Nx is an open-source build framework that helps you architect, test, and build at any scale — integrating seamlessly with modern technologies and libraries, while providing a robust command-line interface (CLI), caching, and dependency management. Nx offers developers advanced CLI tools and plugins for modern frameworks, tests, and tools.
For this article, we will be focusing on how Nx works with Next.js applications. Nx provides standard tools for testing and styling in your Next.js applications, such as Cypress, Storybook, and styled-components. Nx facilitates a monorepo for your applications, creating a workspace that can hold the source code and libraries of multiple applications, allowing you to share resources between applications.
Why Use Nx?
Nx provides developers with a reasonable amount of functionality out of the box, including boilerplates for end-to-end (E2E) testing of your application, a styling library, and a monorepo.
Many advantages come with using Nx, and we’ll walk through a few of them in this section.
- Graph-based task execution
Nx uses distributed graph-based task execution and computation caching to speed up tasks. The system will schedule tasks and commands using a graph system to determine which node (i.e. application) should execute each task. This handles the execution of applications and optimizes execution time efficiently. - Testing
Nx provides preconfigured test tools for unit testing and E2E tests. - Caching
Nx also stores the cached project graph. This enables it to reanalyze only updated files. Nx keeps track of files changed since the last commit and lets you test, build, and perform actions on only those files; this allows for proper optimization when you’re working with a large code base. - Dependency graph
The visual dependency graph enables you to inspect how components interact with each other. - Cloud storage
Nx also provides cloud storage and GitHub integration, so that you can share links with team members to review project logs. - Code sharing
Creating a new shared library for every project can be quite taxing. Nx eliminates this complication, freeing you to focus on the core functionality of your app. With Nx, you can share libraries and components across applications. You can even share reusable code between your front-end and back-end applications. - Support for monorepos
Nx provides one workspace for multiple applications. With this setup, one GitHub repository can house the code source for various applications under your workspace.
Nx for Publishable Libraries
Nx allows you to create publishable libraries. This is essential when you have libraries that you will use outside of the monorepo. In any instance where you are developing organizational UI components with Nx Storybook integration, Nx will create publishable components alongside your stories. The publishable components can compile these components to create a library bundle that you can deploy to an external registry. You would use the --publishable option when generating the library, unlike --buildable, which is used to generate libraries that are used only in the monorepo. Nx does not deploy the publishable libraries automatically; you can invoke the build via a command such as nx build mylib (where mylib is the name of the library), which will then produce an optimized bundle in the dist/mylib folder that can be deployed to an external registry.
Nx gives you the option to create a new workspace with Next.js as a preset, or to add Next.js to an existing workspace.
To create a new workspace with Next.js as a preset, you can use the following command:
npx create-nx-workspace happynrwl \
--preset=next \
--style=styled-components \
--appName=todo
This command will create a new Nx workspace with a Next.js app named “todo” and with styled-components as the styling library.
Then, we can add the Next.js application to an existing Nx workspace with the following command:
npx nx g @nrwl/next:appBuilding a Next.js and Nx Application
The Nx plugin for Next.js includes tools and executors for running and optimizing a Next.js application. To get started, we need to create a new Nx workspace with next as a preset:
npx create-nx-workspace happynrwl \
--preset=next \
--style=styled-components \
--appName=todo
The code block above will generate a new Nx workspace and the Next.js application. We will get a prompt to use Nx Cloud. For this tutorial, we will select “No”, and then wait for our dependencies to install. Once that’s done, we should have a file tree similar to this:
📦happynrwl
 ┣ 📂apps
 ┃ ┣ 📂todo
 ┃ ┣ 📂todo-e2e
 ┃ ┗ 📜.gitkeep
 ┣ 📂libs
 ┣ 📂node_modules
 ┣ 📂tools
 ┣ 📜.editorconfig
 ┣ 📜.eslintrc.json
 ┣ 📜.gitignore
 ┣ 📜.prettierignore
 ┣ 📜.prettierrc
 ┣ 📜README.md
 ┣ 📜babel.config.json
 ┣ 📜jest.config.js
 ┣ 📜jest.preset.js
 ┣ 📜nx.json
 ┣ 📜package-lock.json
 ┣ 📜package.json
 ┣ 📜tsconfig.base.json
 ┗ 📜workspace.json
In the 📂apps folder, we’ll have our Next.js application “todo”, with the preconfigured E2E test for the to-do app. All is this is auto-generated with the powerful Nx CLI tool.
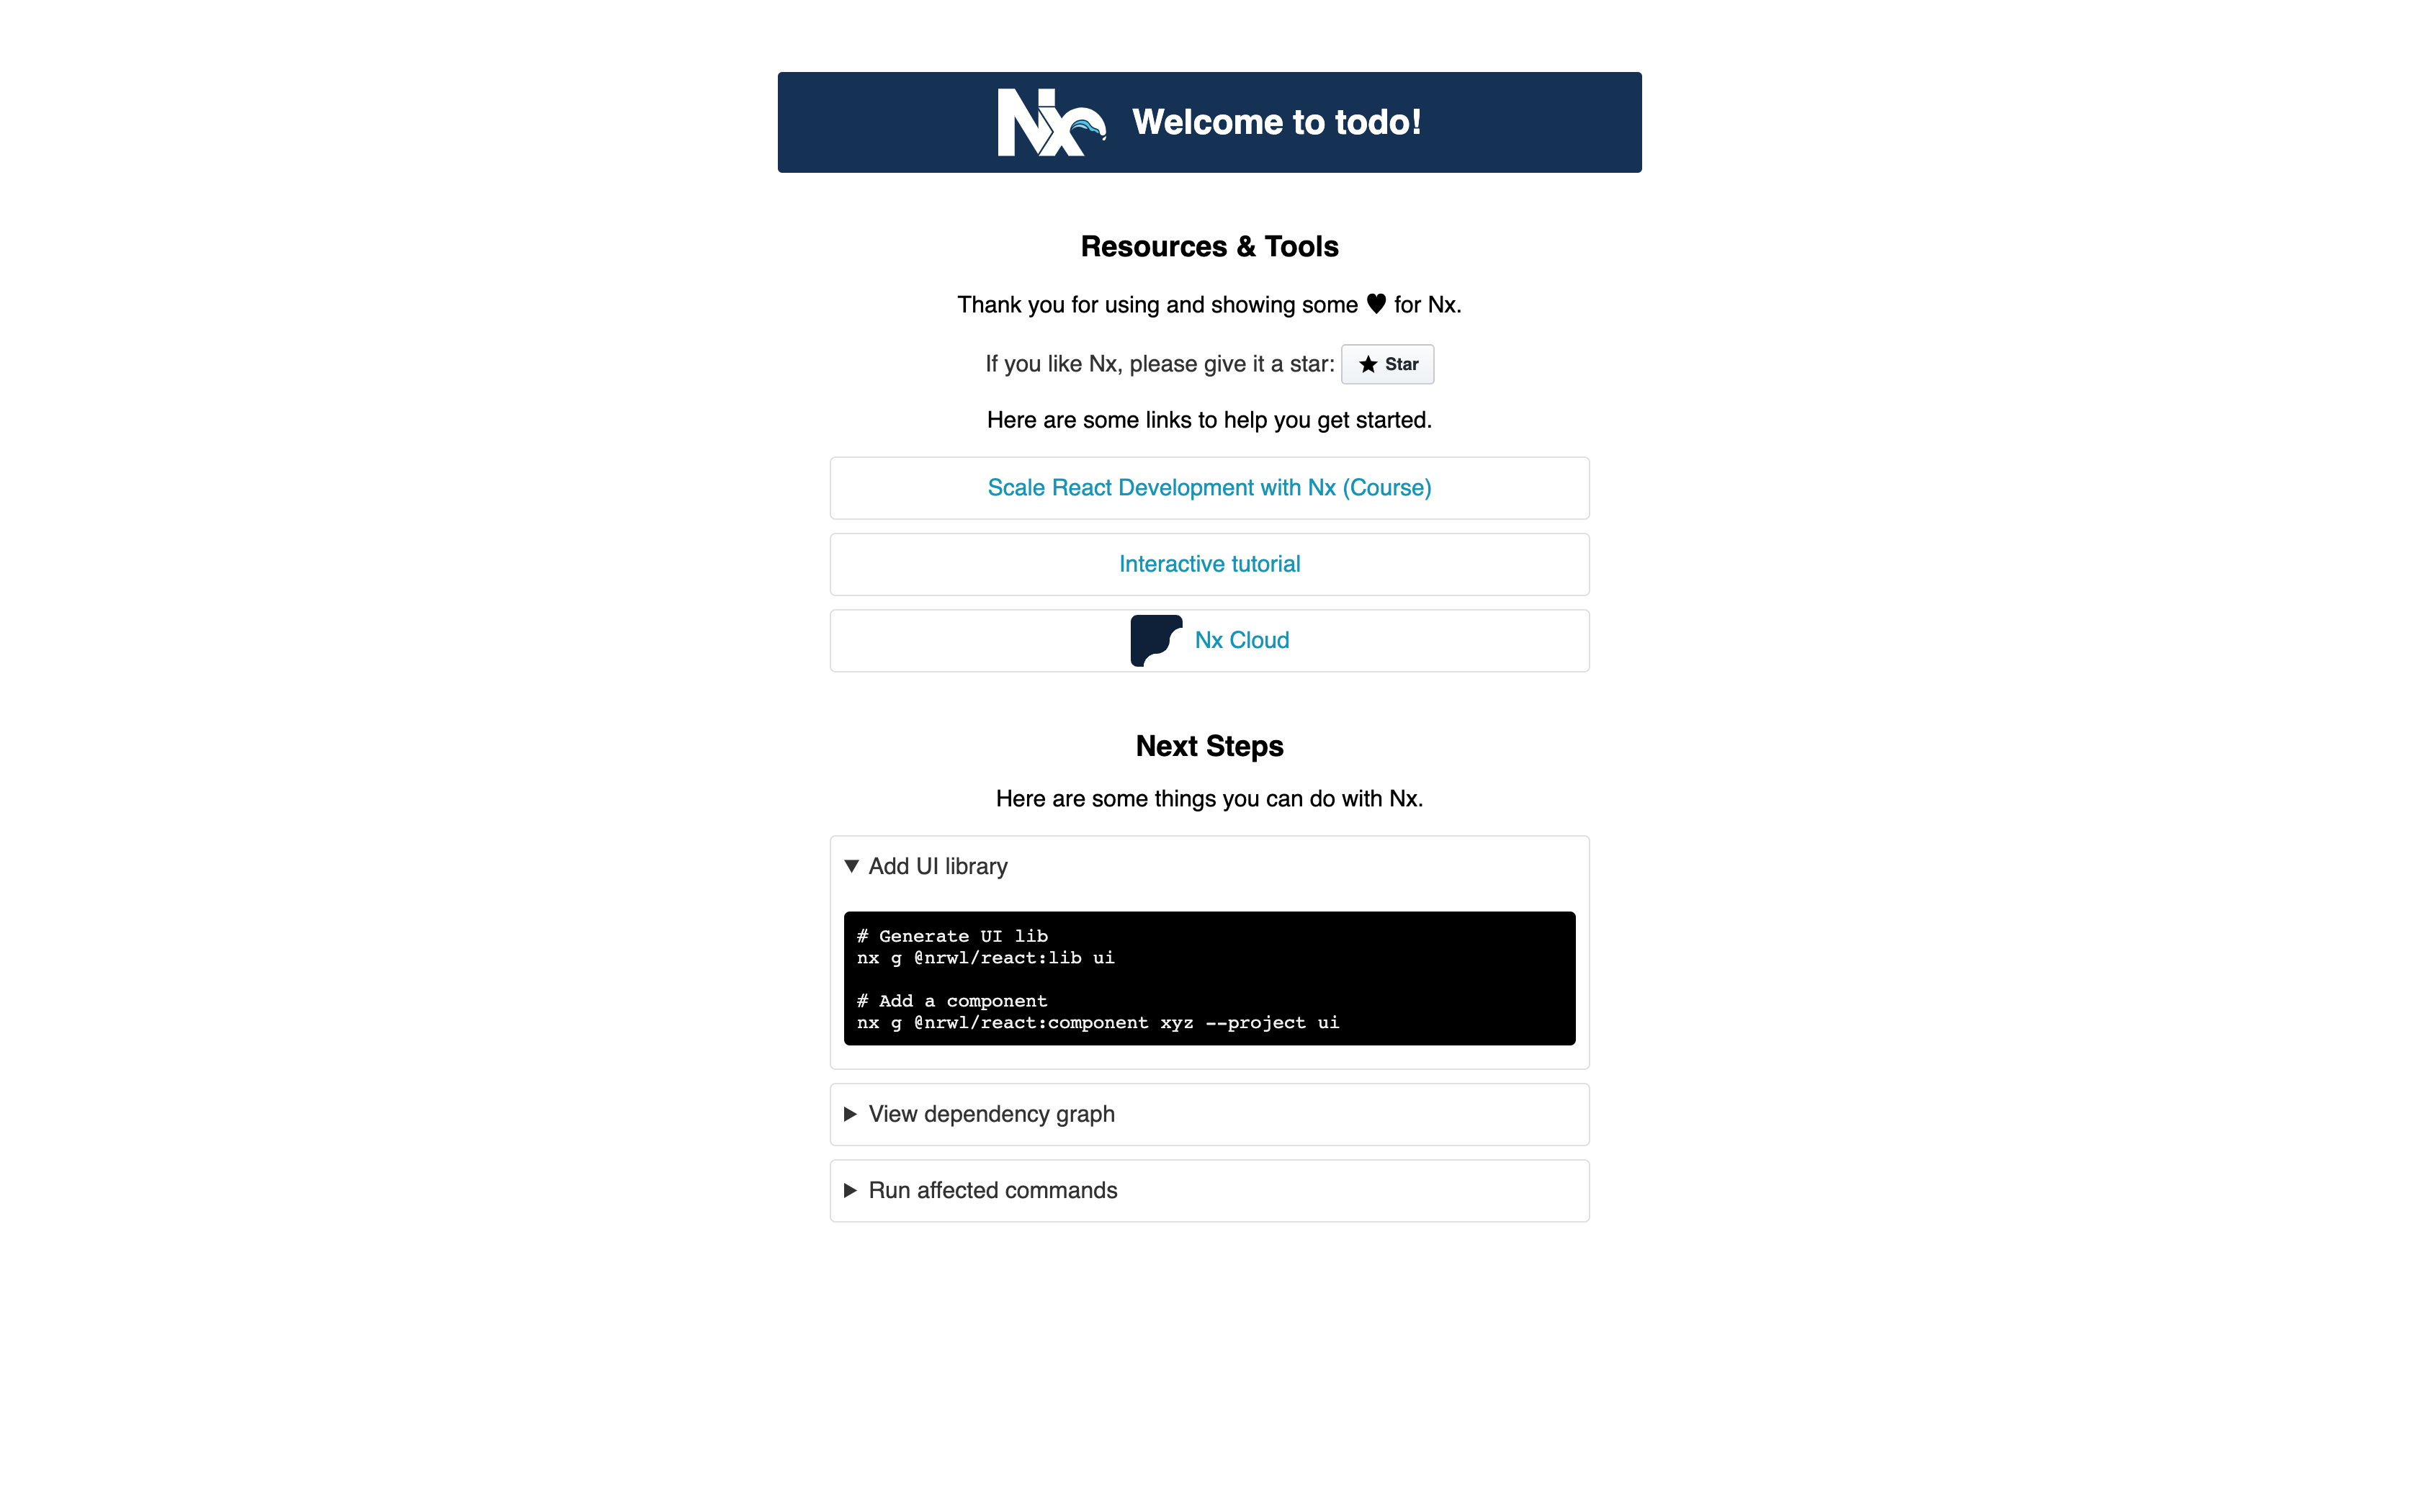
To run our app, use the npx nx serve todo command. Once you’re done serving the app, you should see the screen below:
Building the API
At this point, we have set up the workspace. Up next is building the CRUD API that we will use on the Next.js application. To do this, we will be using Express; to demonstrate monorepo support, we will build our server as an application in the workspace. First, we have to install the Express plugin for Nx by running this command:
npm install --save-dev @nrwl/expressOnce that’s done, we are ready to set up our Express app in the workspace provided. To generate an Express app, run the command below:
npx nx g @nrwl/express:application --name=todo-api --frontendProject=todoThe command nx g @nrwl/express:application will generate an Express application to which we can pass additional specification parameters; to specify the name of the application, use the --name flag; to indicate the front-end application that will be using the Express app, pass the name of an app in our workspace to --frontendProject. A few other options are available for an Express app. When this is done, we will have an updated file structure in the apps folder with the 📂todo-api folder added to it.
📦happynrwl
 ┣ 📂apps
 ┃ ┣ 📂todo
 ┃ ┣ 📂todo-api
 ┃ ┣ 📂todo-e2e
 ┃ ┗ 📜.gitkeep
 …
The todo-api folder is an Express boilerplate with a main.ts entry file.
/**
 * This is not a production server yet!
 * This is only minimal back end to get started.
 */
import * as express from 'express';
import {v4 as uuidV4} from 'uuid';

const app = express();
app.use(express.json()); // used instead of body-parser

app.get('/api', (req, res) => {
  res.send({ message: 'Welcome to todo-api!' });
});

const port = process.env.port || 3333;
const server = app.listen(port, () => {
  console.log(`Listening at http://localhost:${port}/api`);
});
server.on('error', console.error);
We will be creating our routes inside this app. To get started, we will initialize an array of objects with two key-value pairs, item and id, just under the app declaration.
/**
 * This is not a production server yet!
 * This is only minimal back end to get started.
 */
import * as express from 'express';
import {v4 as uuidV4} from 'uuid';

const app = express();
app.use(express.json()); // used instead of body-parser

let todoArray: Array<{ item: string; id: string }> = [
  { item: 'default todo', id: uuidV4() },
];
…
Next up, we will set up the route to fetch all to-do lists under app.get():
…
app.get('/api', (req, res) => {
  res.status(200).json({
    data: todoArray,
  });
});
…
The code block above will return the current value of todoArray. Subsequently, we will have routes for creating, updating, and removing to-do items from the array.
…

app.post('/api', (req, res) => {
  const item: string = req.body.item;
  // Increment ID of item based on the ID of the last item in the array.
  let id: string = uuidV4();
  // Add the new object to the array
  todoArray.push({ item, id });
  res.status(200).json({
    message: 'item added successfully',
  });
});
app.patch('/api', (req, res) => {
  // Value of the updated item
  const updatedItem: string = req.body.updatedItem;
  // ID of the position to update
  const id: string = req.body.id;
  // Find index of the ID
  const arrayIndex = todoArray.findIndex((obj) => obj.id === id);

  // Update item that matches the index
  todoArray[arrayIndex].item = updatedItem

  res.status(200).json({
    message: 'item updated successfully',
  });
});

app.delete('/api', (req, res) => {
  // ID of the position to remove
  const id: string = req.body.id;
  // Update array and remove the object that matches the ID
  todoArray = todoArray.filter((val) => val.id !== id);
  res.status(200).json({
    message: 'item removed successfully',
  });
});

…
To create a new to-do item, all we need is the value of the new item as a string. We’ll generate an ID by incrementing the ID of the last element in the array on the server. To update an existing item, we would pass in the new value for the item and the ID of the item object to be updated; on the server, we would loop through each item with the forEach method, and update the item in the place where the ID matches the ID sent with the request. Finally, to remove an item from the array, we’d send the item’s ID to be removed with the request; then, we filter through the array, and return a new array of all items not matching the ID sent with the request, assigning the new array to the todoArray variable.
Note: If you look in the Next.js application folder, you should see a proxy.conf.json file with the configuration below:
{
  "/api": {
    "target": "http://localhost:3333",
    "secure": false
  }
}
This creates a proxy, allowing all API calls to routes matching /api to target the todo-api server.
Generating Next.js Pages With Nx
In our Next.js application, we will generate a new page, home, and an item component. Nx provides a CLI tool for us to easily create a page:
npx nx g @nrwl/next:page homeUpon running this command, we will get a prompt to select the styling library that we want to use for the page; for this article, we will select styled-components. Voilà! Our page is created. To create a component, run npx nx g @nrwl/next:component todo-item; this will create a component folder with the todo-item component.
API Consumption in Next.js Application
In each to-do item, we will have two buttons, to edit and delete the to-do item. The asynchronous functions performing these actions are passed as props from the home page.
…
export interface TodoItemProps {
  updateItem(id: string, updatedItem: string): Promise<void>;
  deleteItem(id: string): Promise<void>;
  fetchItems(): Promise<any>;
  item: string;
  id: string;
}
export const FlexWrapper = styled.div`
  width: 100%;
  display: flex;
  justify-content: space-between;
  align-items: center;
  border-bottom: 1px solid #ccc;
  padding-bottom: 10px;
  margin-top: 20px;
  @media all and (max-width: 470px) {
    flex-direction: column;
    input {
      width: 100%;
    }
    button {
      width: 100%;
    }
  }
`;

export function TodoItem(props: TodoItemProps) {
  const [isEditingItem, setIsEditingItem] = useState<boolean>(false);
  const [item, setNewItem] = useState<string | null>(null);

  return (
    <FlexWrapper>
      <Input
        disabled={!isEditingItem}
        defaultValue={props.item}
        isEditing={isEditingItem}
        onChange={({ target }) => setNewItem(target.value)}
      />
      {!isEditingItem && <Button
        onClick={() => setIsEditingItem(true)}
      >
        Edit
      </Button>}
      {isEditingItem && <Button onClick={async () => {
         await props.updateItem(props.id, item);
         //fetch updated items
         await props.fetchItems();
         setIsEditingItem(false)
         }}>
        Update
      </Button>}
      <Button
        danger
        onClick={async () => {
          await props.deleteItem(props.id);

          //fetch updated items
          await await props.fetchItems();
        }}
      >
        Delete
      </Button>
    </FlexWrapper>
  );
}
For the updating functionality, we have an input that is disabled when the isEditingItem state is false. Once the “Edit” button is clicked, it toggles the isEditingItem state to true and displays the “Update” button. Here, the input component is enabled, and the user can enter a new value; when the “Update” button is clicked, it calls the updateItem function with the parameters passed in, and it toggles isEditingItem back to false.
In the home page component, we have the asynchronous functions performing the CRUD operation.
 …
  const [items, setItems] = useState<Array<{ item: string; id: string }>>([]);
  const [newItem, setNewItem] = useState<string>('');
  const fetchItems = async () => {
    try {
      const data = await fetch('/api/fetch');
      const res = await data.json();
      setItems(res.data);
    } catch (error) {
      console.log(error);
    }
  };
  const createItem = async (item: string) => {
    try {
      const data = await fetch('/api', {
        method: 'POST',
        body: JSON.stringify({ item }),
        headers: {
          'Content-Type': 'application/json',
        },
      });
    } catch (error) {
      console.log(error);
    }
  };
  const deleteItem = async (id: string) => {
    try {
      const data = await fetch('/api', {
        method: 'DELETE',
        body: JSON.stringify({ id }),
        headers: {
          'Content-Type': 'application/json',
        },
      });
      const res = await data.json();
      alert(res.message);
    } catch (error) {
      console.log(error);
    }
  };
  const updateItem = async (id: string, updatedItem: string) => {
    try {
      const data = await fetch('/api', {
        method: 'PATCH',
        body: JSON.stringify({ id, updatedItem }),
        headers: {
          'Content-Type': 'application/json',
        },
      });
      const res = await data.json();
      alert(res.message);
    } catch (error) {
      console.log(error);
    }
  };
  useEffect(() => {
    fetchItems();
  }, []);
…
In the code block above, we have fetchItems, which returns todoArray from the server. Then, we have the createItem function, which takes a string; the parameter is the value of the new to-do item. The updateItem function takes two parameters, the ID of the item to be updated and the updatedItem value. And the deleteItem function removes the item matching the ID that is passed in.
To render the to-do item, we map through the items state:
 …
return (
    <StyledHome>
      <h1>Welcome to Home!</h1>
      <TodoWrapper>
         {items.length > 0 &&
          items.map((val) => (
            <TodoItem
              key={val.id}
              item={val.item}
              id={val.id}
              deleteItem={deleteItem}
              updateItem={updateItem}
              fetchItems={fetchItems}
            />
          ))}
      </TodoWrapper>
      <form
        onSubmit={async(e) => {
          e.preventDefault();
          await createItem(newItem);
          //Clean up new item
          setNewItem('');
          await fetchItems();
        }}
      >
        <FlexWrapper>
          <Input
            value={newItem}
            onChange={({ target }) => setNewItem(target.value)}
            placeholder="Add new item…"
          />
          <Button success type="submit">
            Add +
          </Button>
        </FlexWrapper>
      </form>
    </StyledHome>
  );
…
Our server and front end are now set up. We can serve the API application by running npx nx serve todo-api, and for the Next.js application, we run npx nx serve todo. Click the “Continue” button, and you will see a page with the default to-do item displayed.
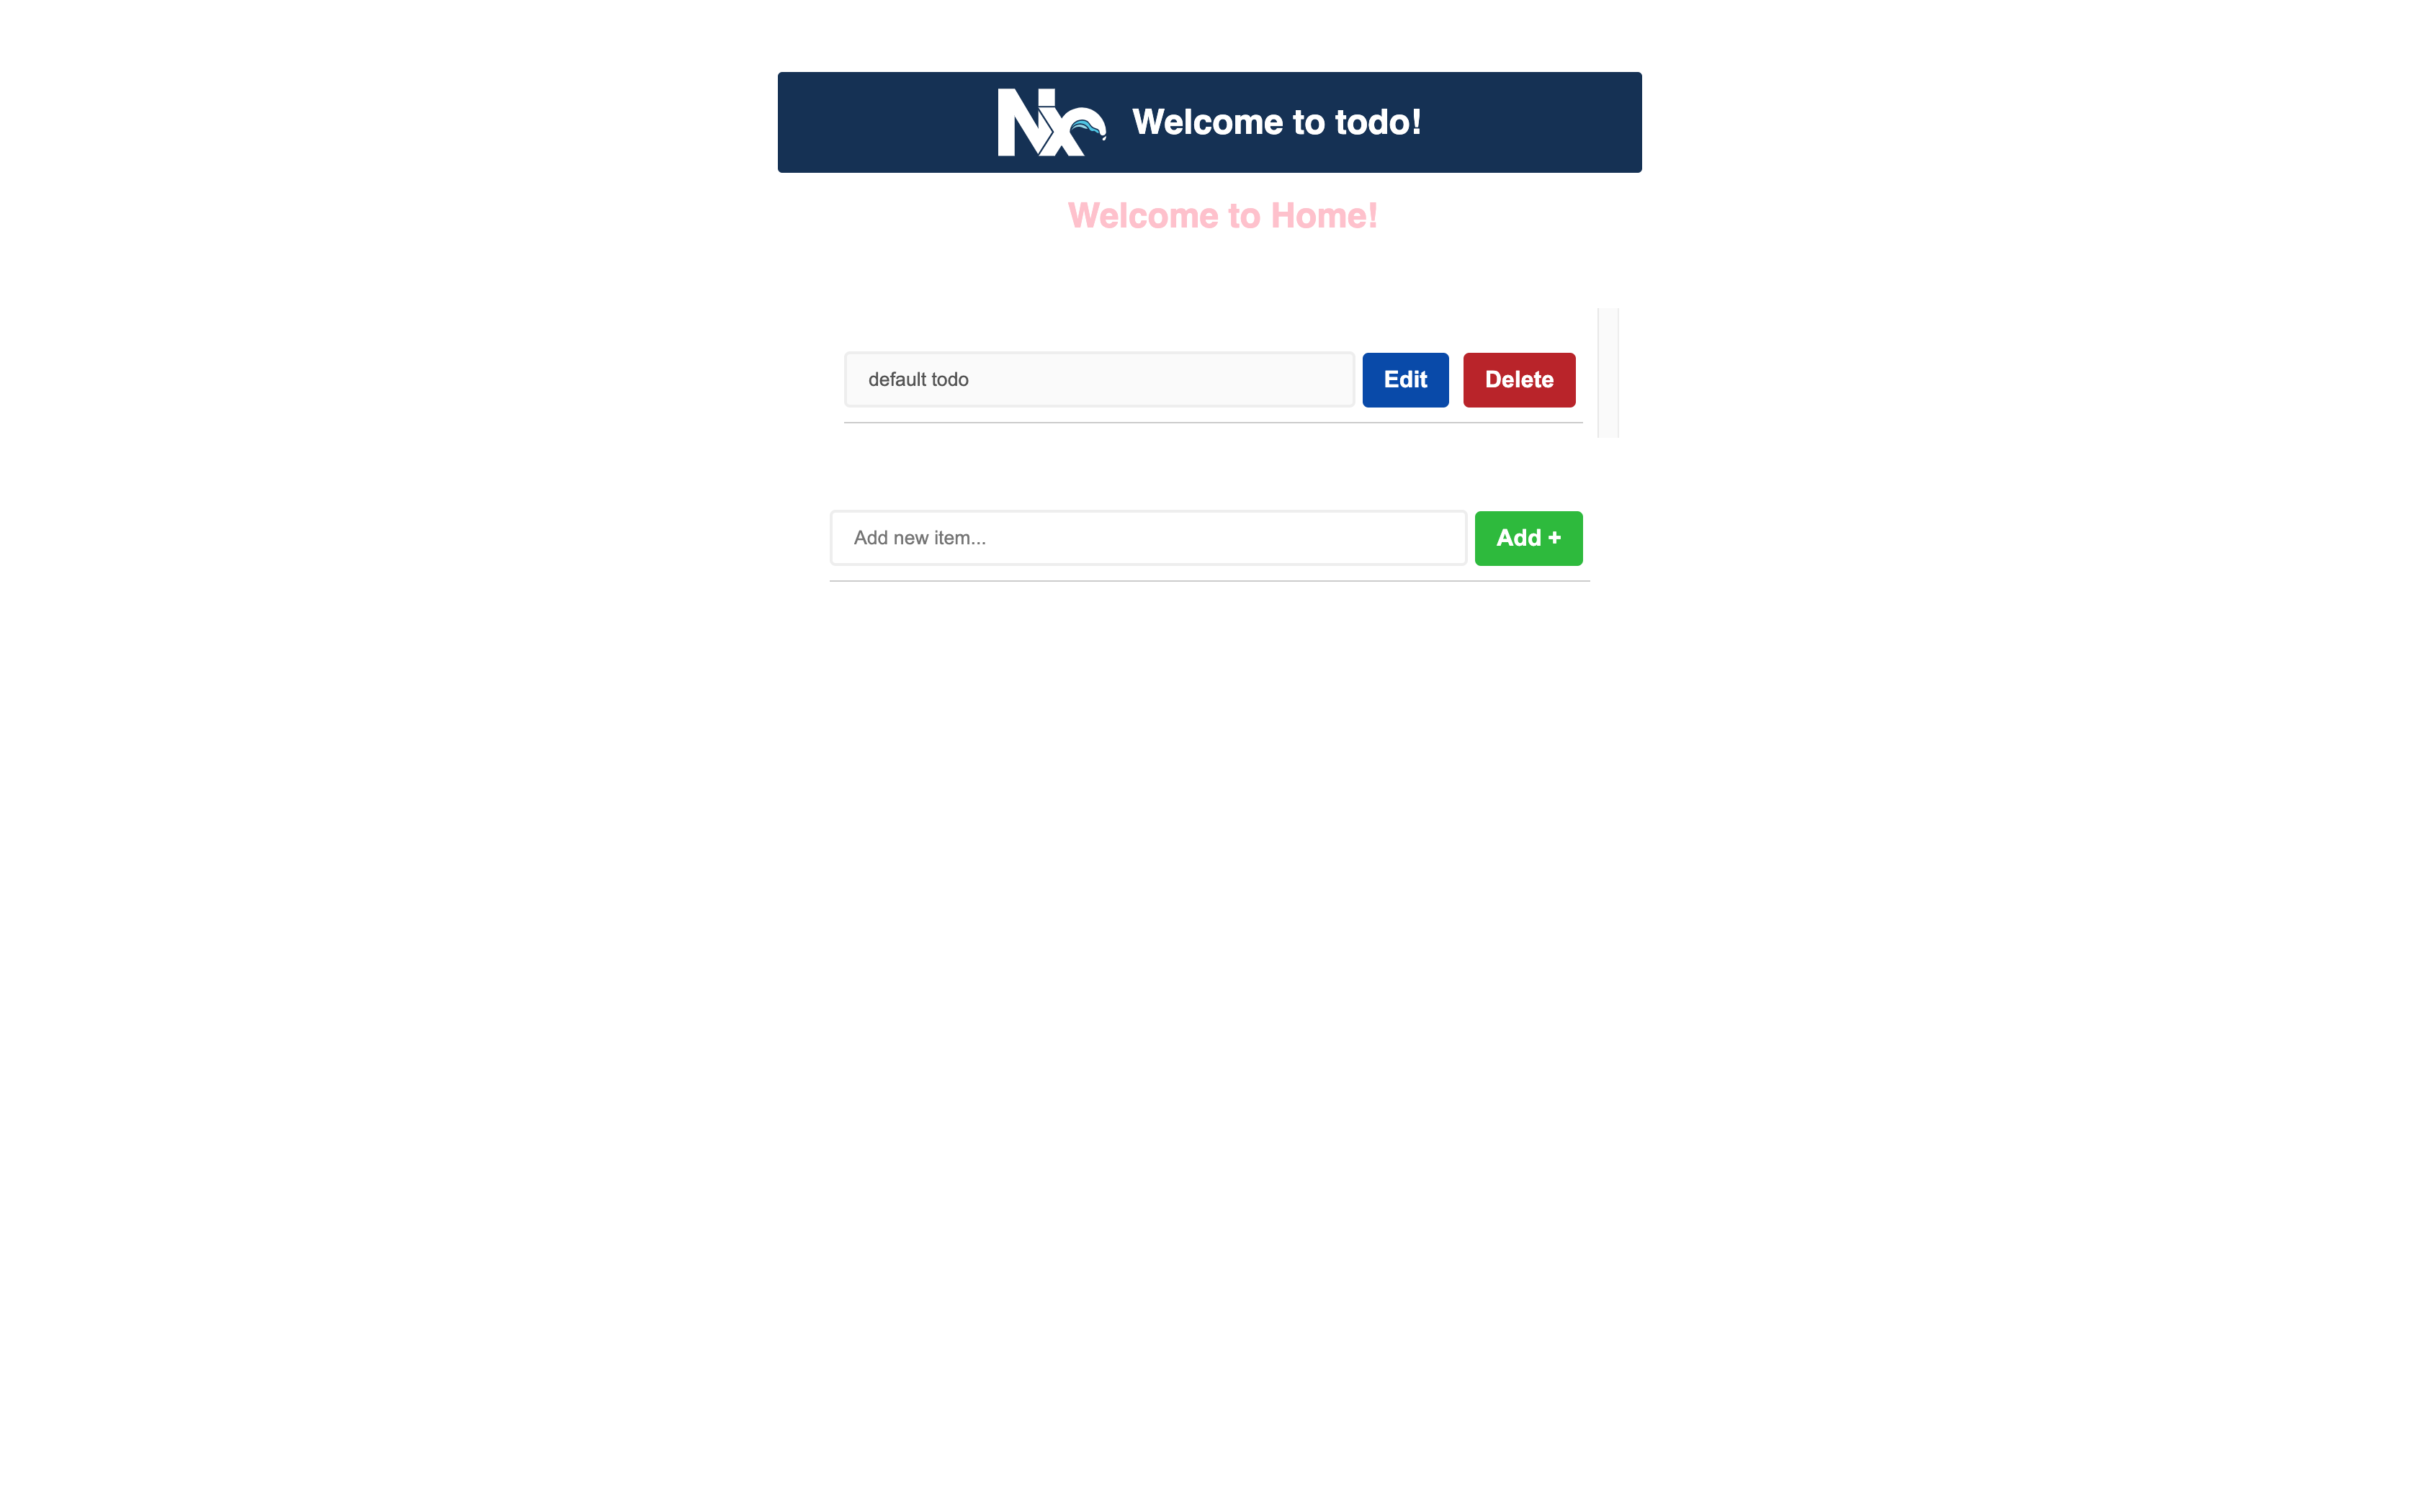
We now have a working Next.js and Express application working together in one workspace.
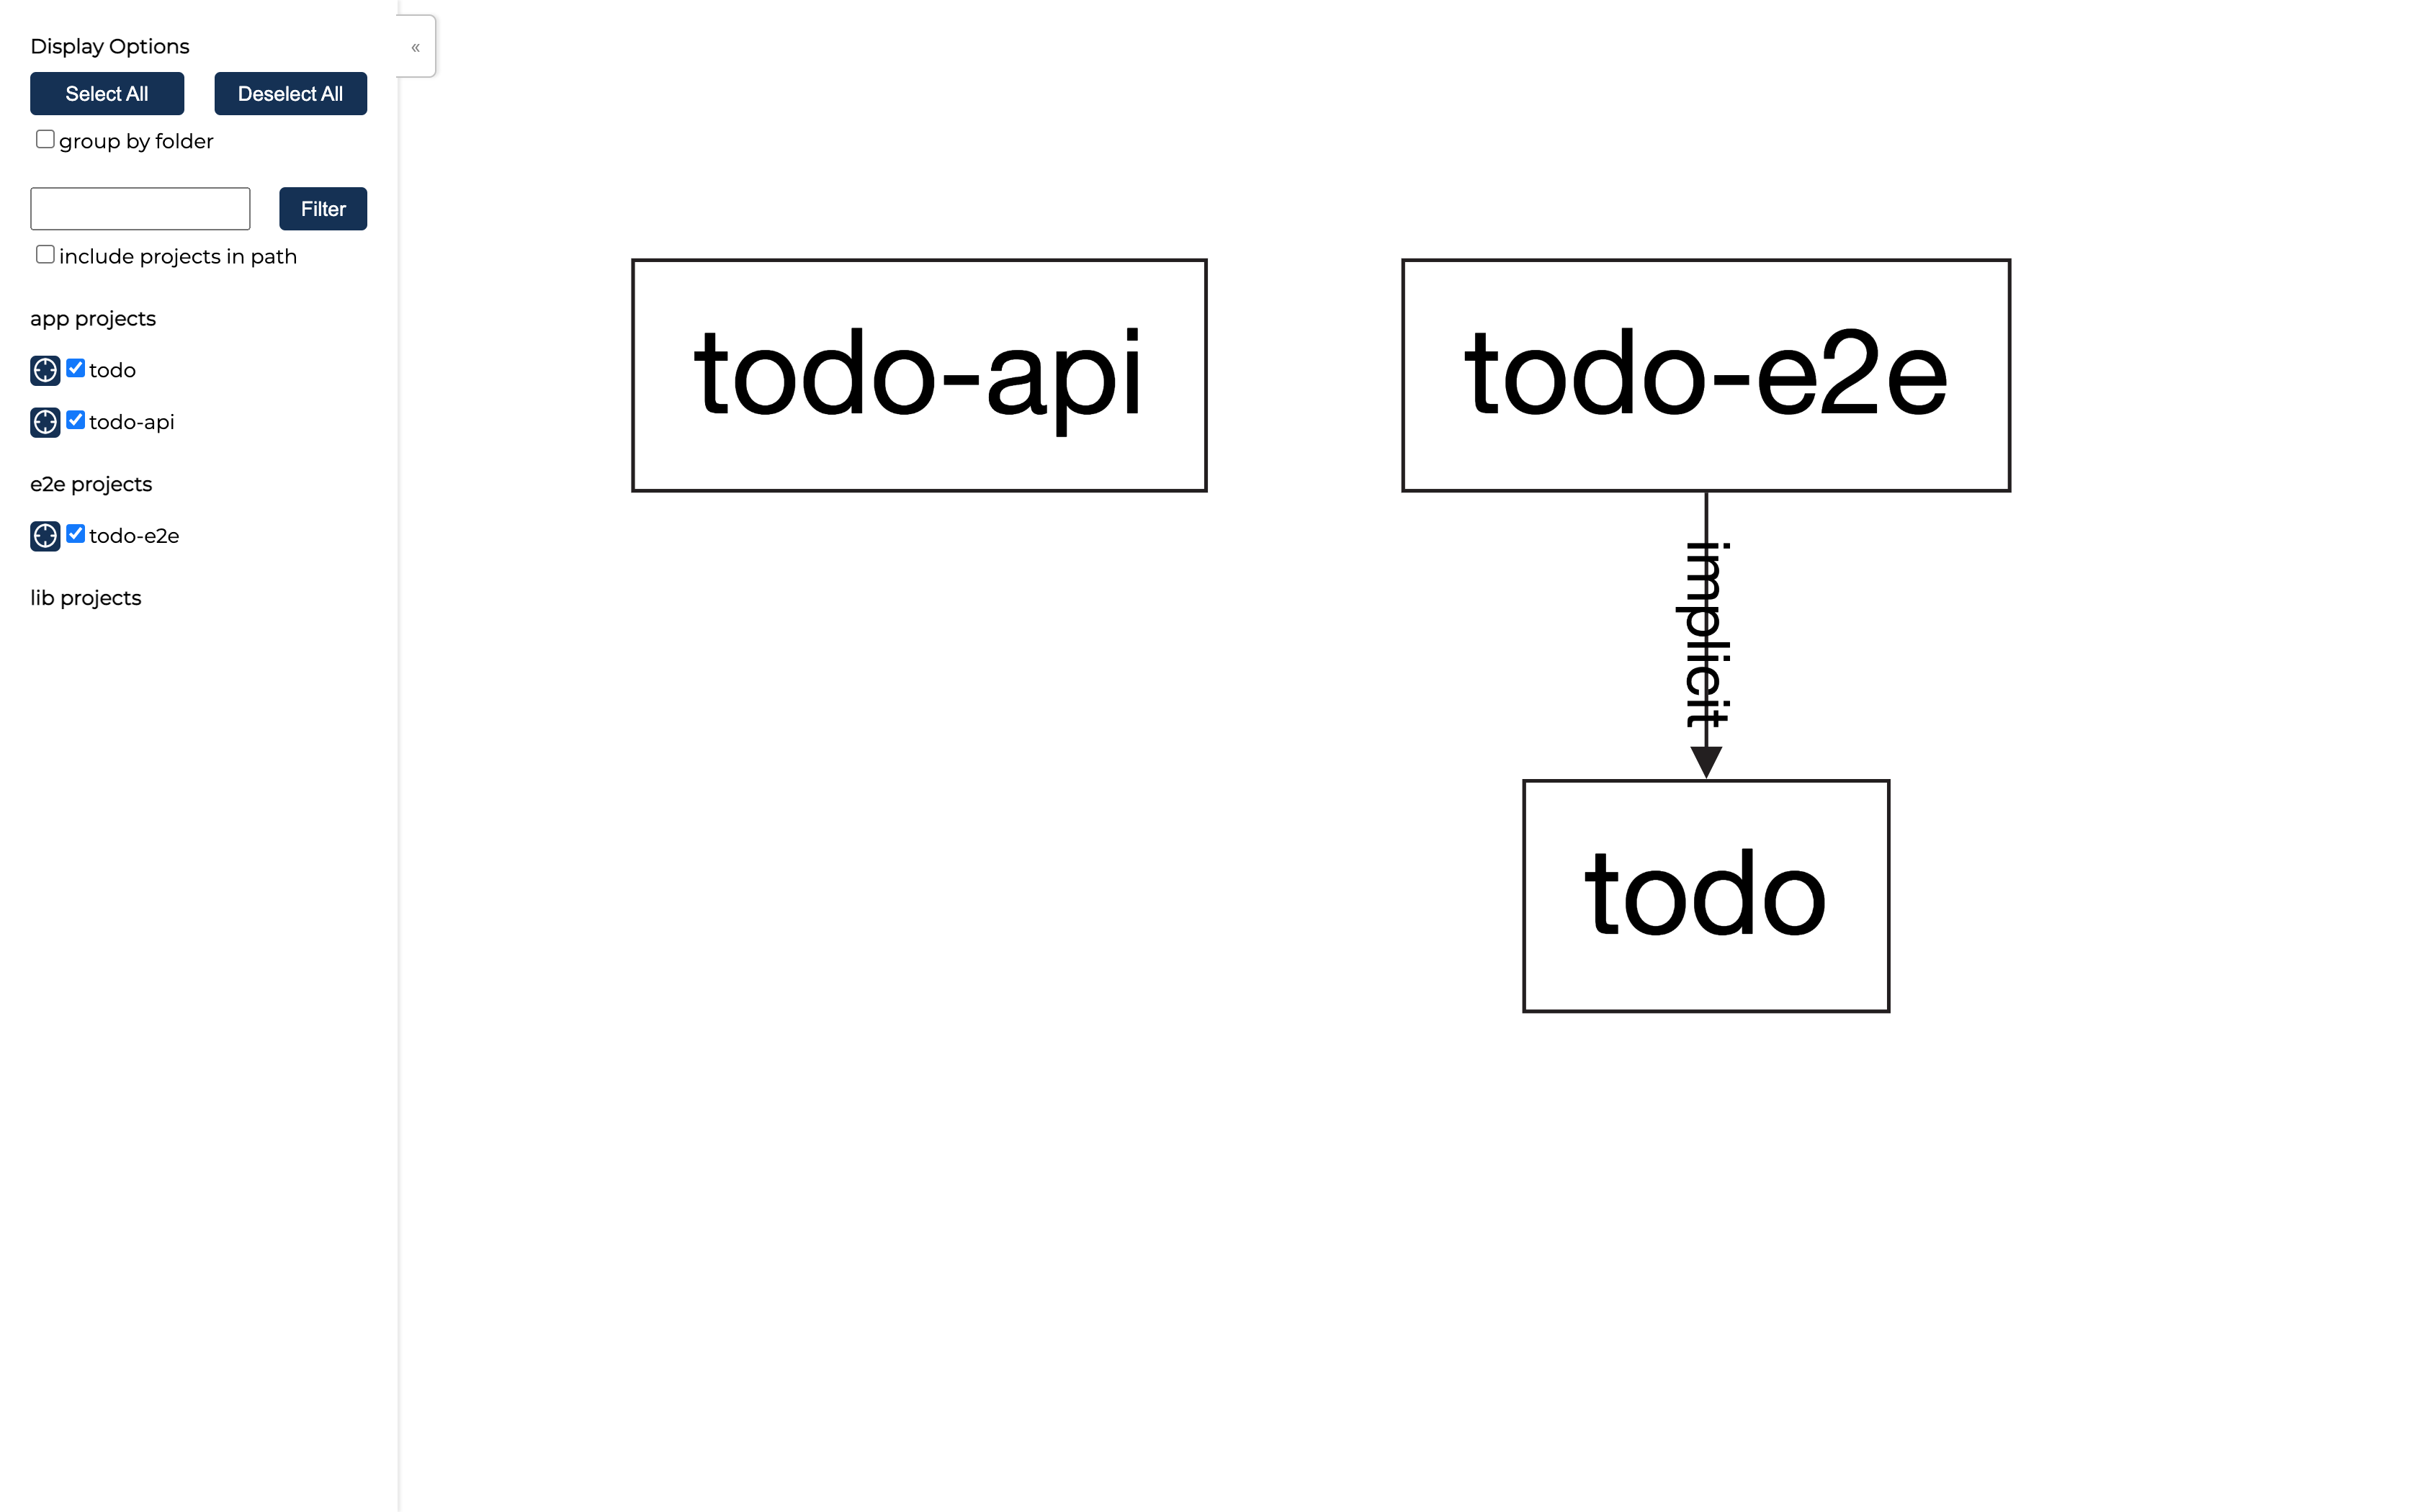
Nx has another CLI tool that allows us to view the dependency graph of our application in our terminal run. Run npx nx dep-graph, and we should see a screen similar to the image below, depicting the dependency graph of our application.
Other CLI Commands for Nx
nx list
Lists the currently installed Nx plugins.nx migrate latest
Updates the packages inpackage.jsonto the latest version.nx affected
Performs the action on only the affected or modified apps.nx run-many --target serve --projects todo-api,todo
Runs the target command across all projects listed.
Conclusion
As a general overview of Nx, this article has covered what Nx offers and how it makes work easier for us. We also walked through setting up a Next.js application in an Nx workspace, adding an Express plugin to an existing workspace, and using the monorepo feature to house more than one application in our workspace.
You will find the complete source code in the GitHub repository. For additional information about Nx, check out the documentation or the Nx documentation for Next.js.


